SERVICE MANUAL
  Applies to: Hyundai Coupe/Tiburon 1998-2001
GROUP
Heating, Ventilation & Air Conditioning Air Conditioning System
Return to Main Menu(s):      Mechanical Manual      Electrical Manual

ON-VEHICLE INSPECTION 
RECEIVER DRIER
  1. Check the dual pressure switch and the fittings for leakage, using a leak detector.

  1. Check the receiver/drier for clogging.

    1. Run the engine at fast idle with the air conditioning ON.
    1. Check both the inlet and outlet temperature. If difference in temperatures between the inlet and outlet is large, replace the receiver-drier.
DUAL PRESSURE SWITCH
REMOVAL
  1. Discharge refrigerant from the air conditioning system.

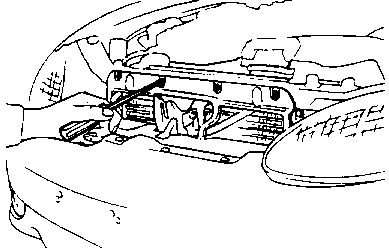
  1. Remove the radiator upper grille.

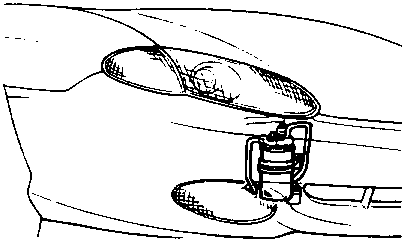
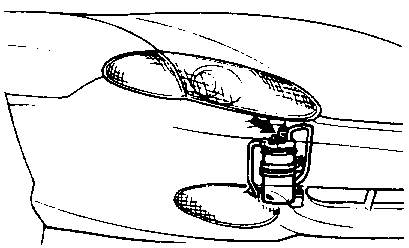
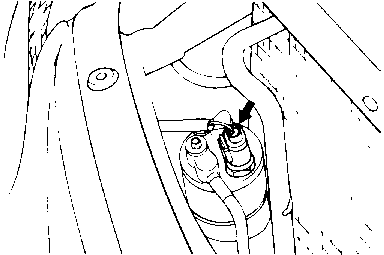
  1. Disconnect the dual pressure switch connector.

  1. Remove the dual pressure switch with wrench. (22mm)

  1. Installation is the reverse order of removal.

  1. After installation, evacuate, charge and test the air conditioning system.

DUAL PRESSURE SWITCH
R-12
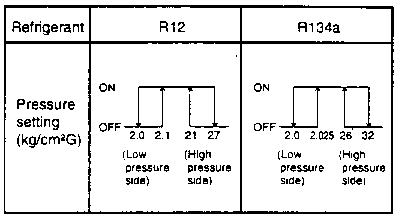
The dual pressure switch is a combination of the low pressure switch (for checking the quantity of refrigerant) and the high pressure switch (for prevention of overheating). It is installed in the receiver, and when the pressure becomes approximately 200 kpa (28 psi) or lower, the compressor stops, thus preventing the compressor from being damaged by heat. When the pressure reaches 2,700 kpa (384 psi) or higher, the compressor stops, thus preventing overheating. There is generally no necessity for inspection; if, however, an unusual condition, such as non-operation of the compressor is encountered, check by following the procedures below.
R-134a
The dual pressure switch is a combination of the low pressure switch (for checking the quantity of refrigerant) and the high pressure switch (for prevention of overheating). It is installed in the receiver, and when the pressure becomes approximately 200 kpa (29 psi) or lower, the compressor stops, thus preventing the compressor from being damaged by heat. When the pressure reaches approximately 3,140 kpa (455 psi) or higher, the compressor stops, thus preventing overheating. There is generally no necessity for inspection; if, however, an unusual condition, such as non-operation of the compressor is encountered, check by following the procedures below.
ON-VEHICLE INSPECTION
  1. Disconnect connector of the dual pressure switch.

  1. Install the manifold gauge set.

  1. Observe the gauge reading to confirm that refrigerant is sufficient in the air conditioning system.

  1. If refrigerant is sufficient, check the continuity between the two terminals of the dual pressure switch shown in the figure. If defective, replace the dual pressure switch.

Return to Main Menu(s):      Mechanical Manual      Electrical Manual

REMOVE AND INSTALLATION RECEIVER DRIER 
NOTE
Plug all of the open fittings immediately after removal to keep moisture out of the system.
  1. Discharge refrigerant from the air conditioning system.

  1. Remove the radiator upper grille.

  1. Disconnect the dual pressure switch connector.

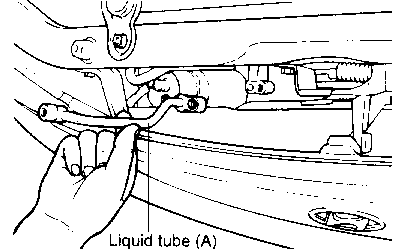
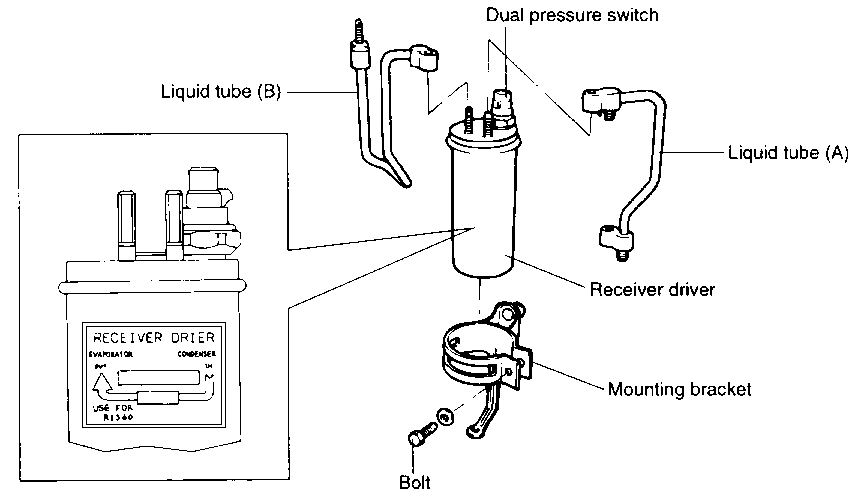
  1. Remove the liquid tube (A). (Refer to the "Removal of the liquid tube (A)" on page HA-75)

  1. Disconnect the receiver/driver side fitting of the liquid tube (B).

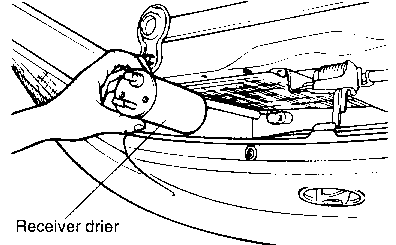
  1. Remove the receiver/drier mounting bolt from the receiver/ drier mounting bracket.

  1. Remove the receiver/drier assembly.

  1. Installation is the reverse order of removal.

    NOTE
    1. While installing each of removed fitting, replace O-ring (if exists) and apply specified lubricant.
    2. Be careful not to bend or twist refrigerant lines in order to install them easily.
    3. After installation, evacuate, charge and teat the air conditioning system.
Return to Main Menu(s):      Mechanical Manual      Electrical Manual

COMPONENTS 
Return to Main Menu(s):      Mechanical Manual      Electrical Manual

ON-VEHICLE INSPECTION 
  1. Check the condenser fins for blockage or damage. If fins are clogged, clean them with compressed air. If the fins are bent, straighten them with a screwdriver or a pair of pliers.

    CAUTION
    Be careful not to damage the fins.
  1. Check the condenser fittings for leakage. Repair or replace if necessary.