Page
last edited Saturday, 27-Apr-2013 20:16:20 BST
HowTo:
Inlet Camshaft Replacement on a
Hyundai Coupe
(You
can see my other 'HowTo' guides here)
I recently
fitted an Evo inlet cam into my standard F2 (2L Beta 1 engine) and
thought a walkthrough of the process might be useful for others
considering doing similar. I'd definitely recommend it - even the
modest extra lift and duration of this cam (as used in the 1.8L Beta 1
engine) makes a noticeable (and positive) difference in both sound and
extra torque at low revs. There might well be other improvements too
but these aspects were immediately apparent without having to do before/after
dyno tests.
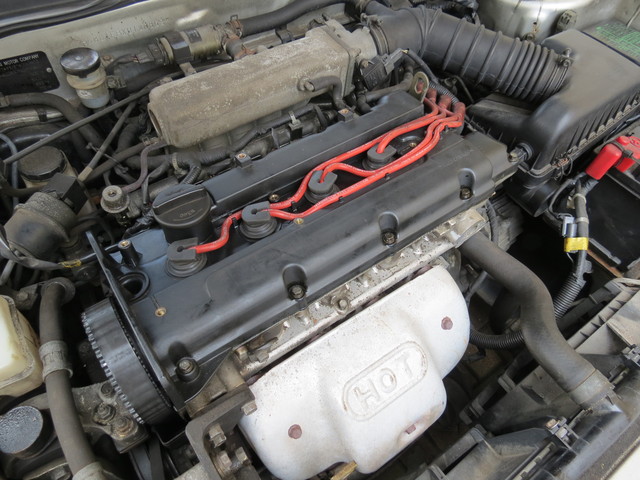
So, first things first, there are a few things that need removing in
order to access the camshafts - namely the oil filler cap, three
covers, the HT leads and two breather pipes:
Firstly remove the oil filler cap and the spark plug cover by removing its five bolts:
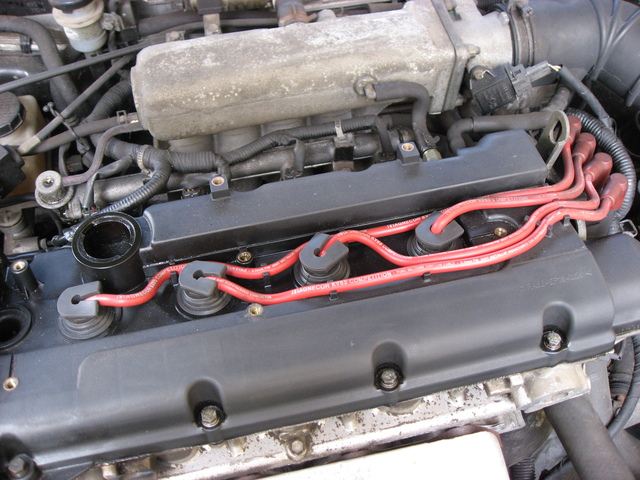
Then remove the HT leads from the spark plugs. You might want to make a
note of how the cables are routed and if you remove them completely
(i.e. at the coil end too, although this isn't really necessary) then
also note down what connects to what! Or, of course, consult the
picture above when it comes to refitting!
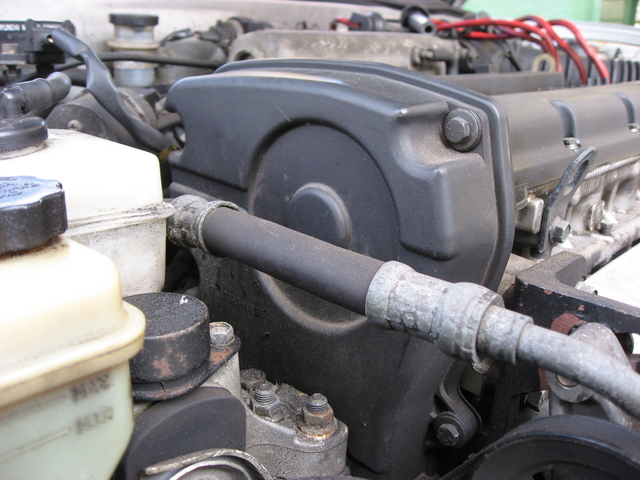
Next up you need to remove the timing belt upper cover. This is secured using four bolts:
The bottom two can be a bit fiddly given the lack of room and so
different length extension bars - normal and wobble - can be handy here.
There are now 12 bolts holding the valve cover down (note there's a
sneaky one in what looks like another spark plug hole on the left):
And finally remove the two breather pipes from the rear of the valve cover:
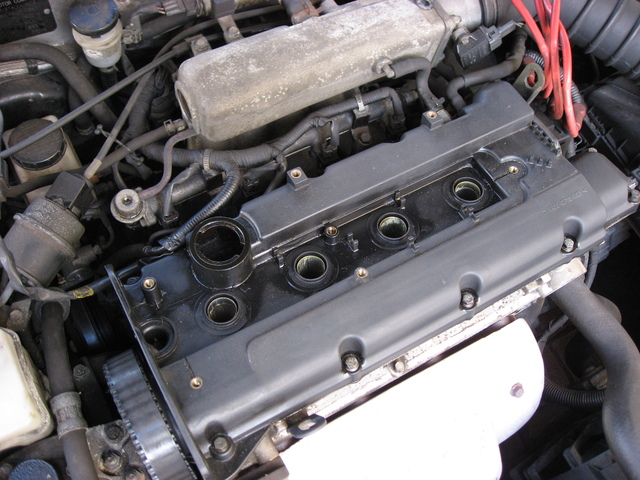
The valve cover can now be prised off - be gentle here, particularly if
you'll be reusing the gasket (I had to as the one I ordered online
didn't arrive in time!). There might be some gasket sealer in place so
you're best off levering it up at one end to break this seal. Once it
starts moving the grip of any remaining sealant will lessen the more it
moves away.
Like you see with treasure chests in films, lifting the cover should
bathe your face in golden light as the majestic sight of the top of the
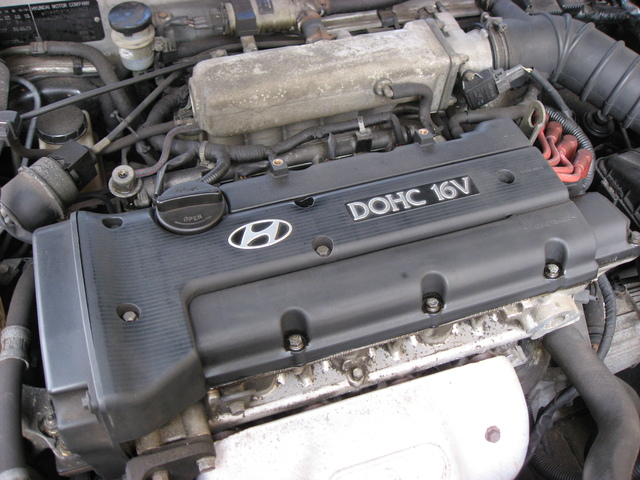
engine appears. Or, if your engine is anything like this one which I
always suspected hadn't received regular oil changes prior to me buying
it a few months ago it'll be rather dark and dingy. This is despite me
changing the oil as soon as I got it and having only done 4k miles
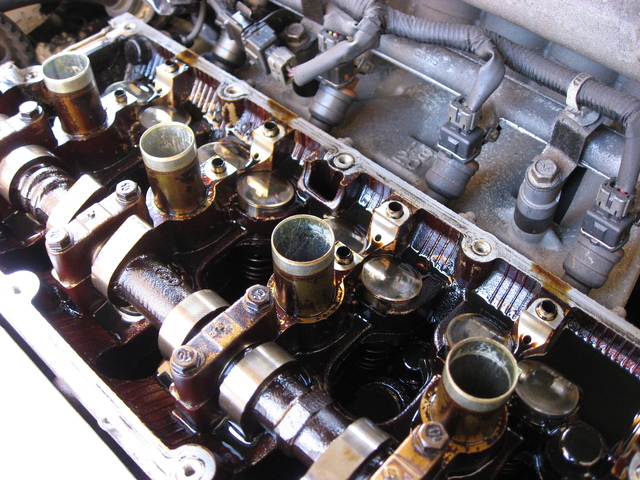
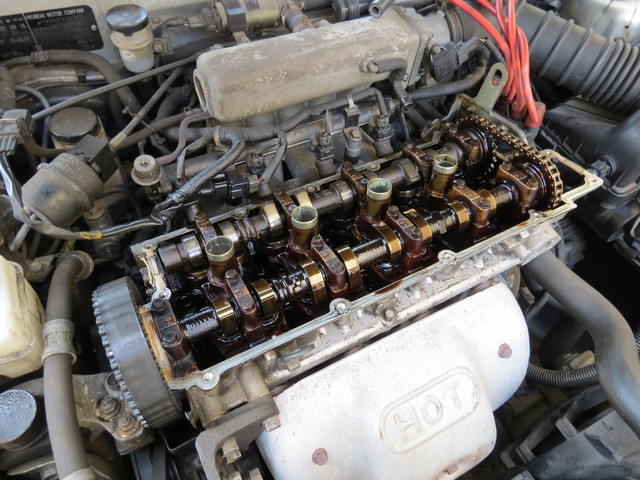
since. By way of comparison, look at the difference in appearance
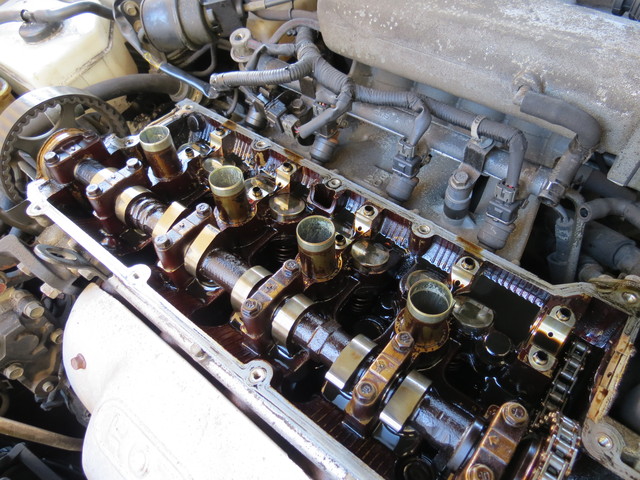
between this engine that's done 88k miles:
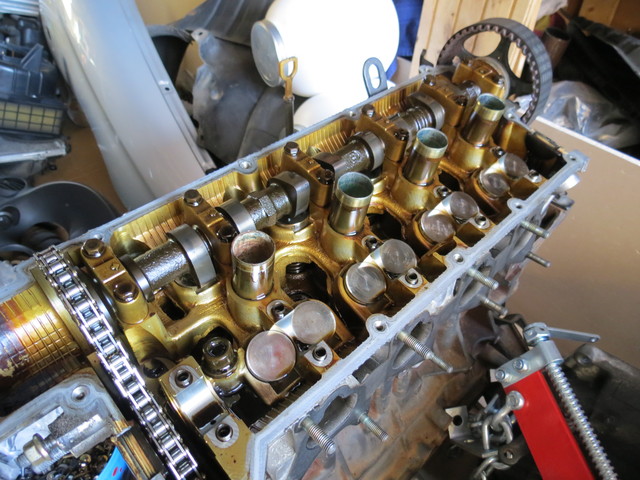
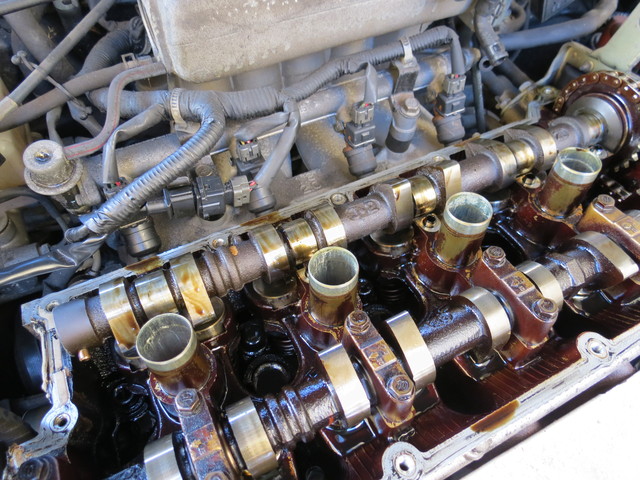
...and my Evo engine that, despite being the same age, has clocked up nearly twice the mileage at 170k:
Now that's the golden light you should be expecting!
If you've never the seen the guts of an DOHC engine before you'll
likely loiter for a few moments taking in the sight - this is pretty
much the heart of the engine given the overhead design. The inlet
camshaft is at the rear (two valves per cylinder) and the exhaust
camshaft is at the front (one valve per cylinder).
Whilst you're in observation mode, it is critical that you
understand the timing marks on the camshaft sprockets. Like all the
best jokes, timing is everything and it's no laughing matter if you get
this wrong on rebuild.
Take a look at this picture:
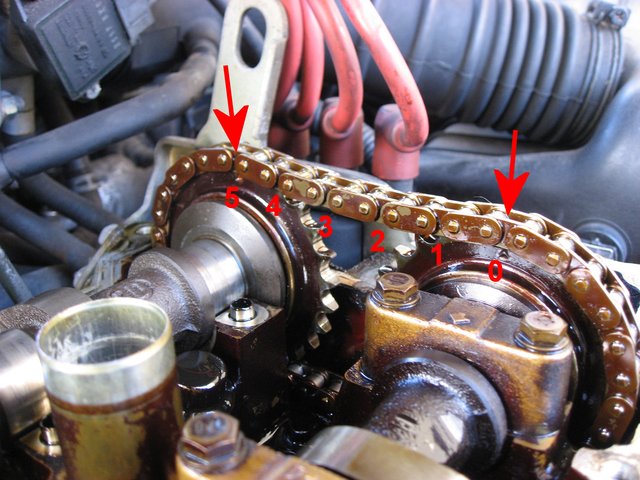
As you can hopefully see there is an arrow/triangle stamped onto each
sprocket and you can count along five from one to the other. Your marks
might align with the centre of a link but the principle is still the
same - count five along from that point to the other. It is absolutely
critical that you are able to repeatedly count and verify the relative
positions of the sprockets on the chain this at this stage because when
we put it back together again you'll need to replicate it.
In your case you might not see any arrows/triangles depending on what
positon the sprockets came to rest. Try checking the other side of the
sprockets as they're stamped in different places on each side.
Alternatively, and this is something we'll want to do later on anyway,
you can turn the engine over by hand by locating the crankshaft pulley
bolt through a hole in the splash guard in the driver's side wheelarch:
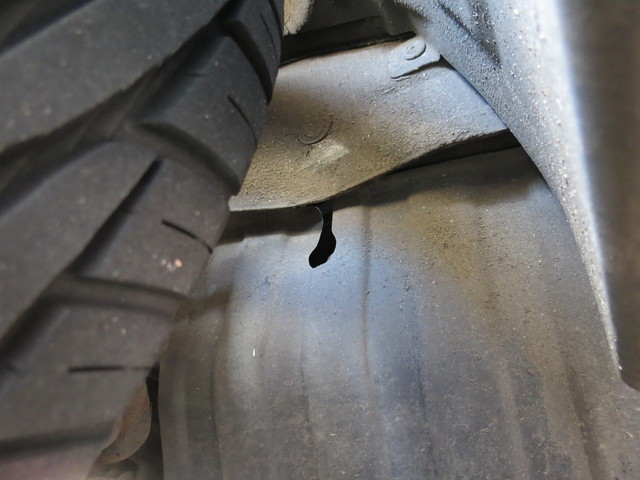

If you put a socket on this bolt and turn it clockwise (it'll present
some resistance, particularly as each piston reaches the top of its
compression stroke) you'll turn the sprockets round to bring the timing
marks into view. Note that it takes two full turns of the crankshaft to
give one full turn of the camshafts.
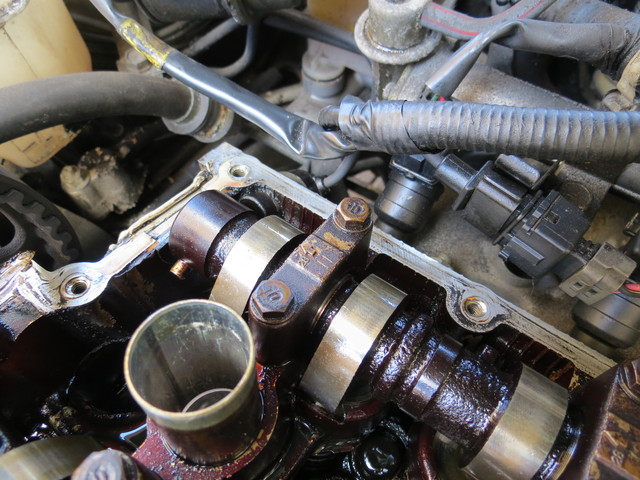
We are now ready to remove the inlet camshaft (the one at the back!)
and to do this you need to remove the five bearing caps. Each one is
numbered 1 to 5 (with an 'I' denoting inlet) and has an arrow pointing
towards the belt end. It is imperative that you put them back in this
same order (and direction) as they will each have slightly different
wear profiles.
I would recommend loosening the bolts in small steps moving 5 through 1
and back round a few times because at least one pair of valve springs
will be pushing up on the camshaft and so doing this will allow it to
rise (perhaps even only slightly) relatively flat whilst spreading the
load. To make this (and refitting) easier you might want to rotate the
engine slightly such that the least amount of valve spring compression
is taking place i.e. none of the lobes are in the straight down
position.
Once each bearing cap has been removed you can then lift the camshaft
up. You might need to gently prise it up but only do so on a rough
section of the shaft and not the smooth journals (the sections that run
inside the bearings) or lobes.
And here is your beautiful baby boy:
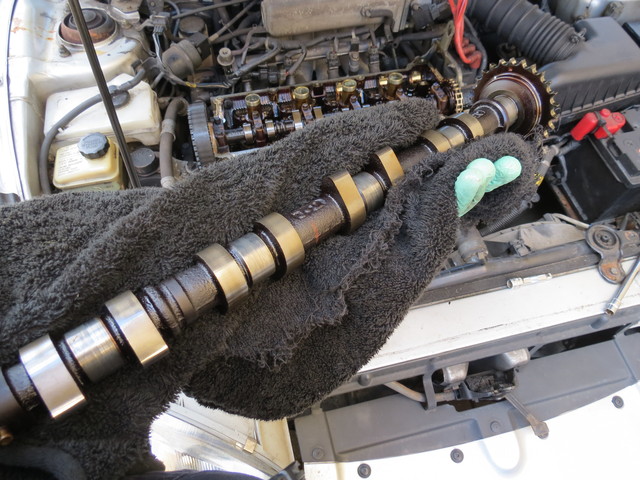
I was swapping mine with one from another engine that had done a
significantly different mileage and so there will inevitably be
differences in wear patterns - in which way I couldn't say as whilst my
Evo engine had done twice the mileage it had almost certainly received
more than twice the level of maintenance!
When it comes to chains and sprockets they wear together. If you marry
up a sprocket with a chain that it hasn't spent it's entire life with
there is a risk that the profiles won't match exactly and this will
lead to accelerated wear of both the chain and the sprocket due to the
reduced contact area that this will present.
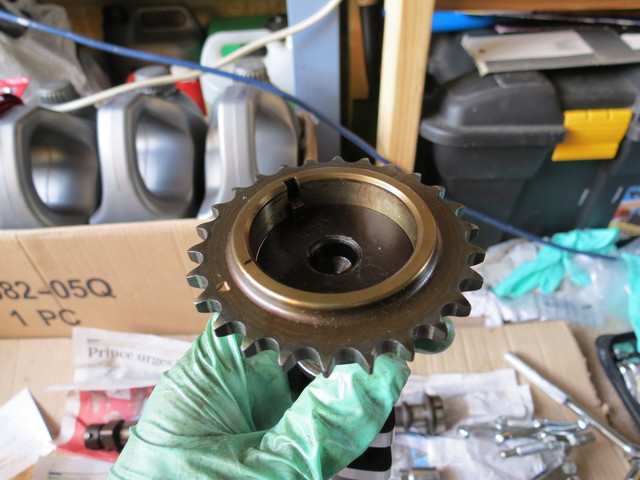
For this reason I opted to swap the sprockets over i.e. put the F2
sprocket (which matches the currently fitted chain, which in turn
matches the exhaust cam sprocket) onto the Evo cam that I was swapping
in. To do this I marked up the outer face of the sprocket (to ensure it
is reassembled the same way round) and removed it with a bearing/pulley
puller:
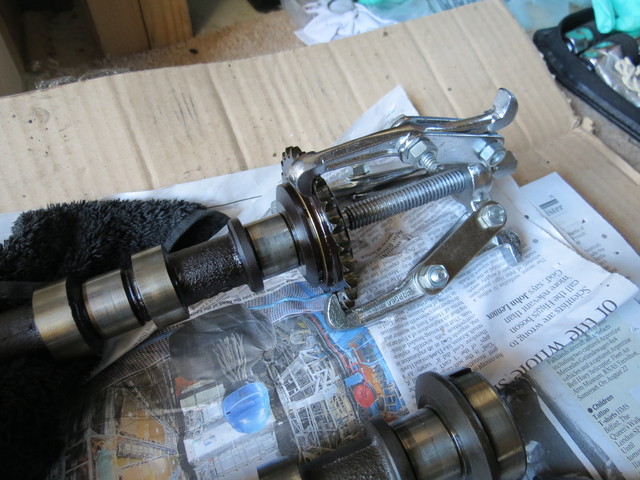
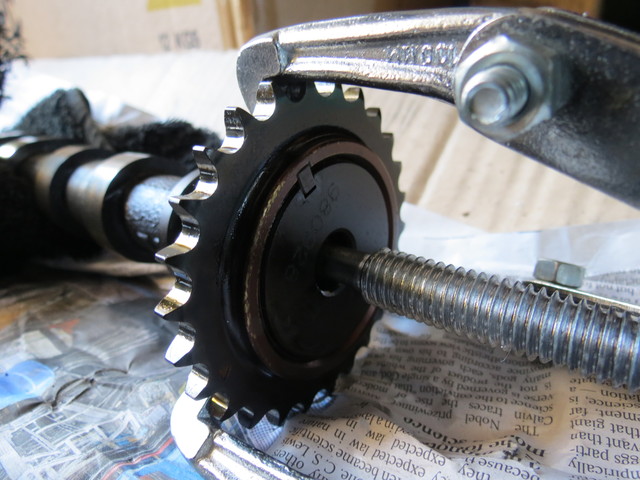
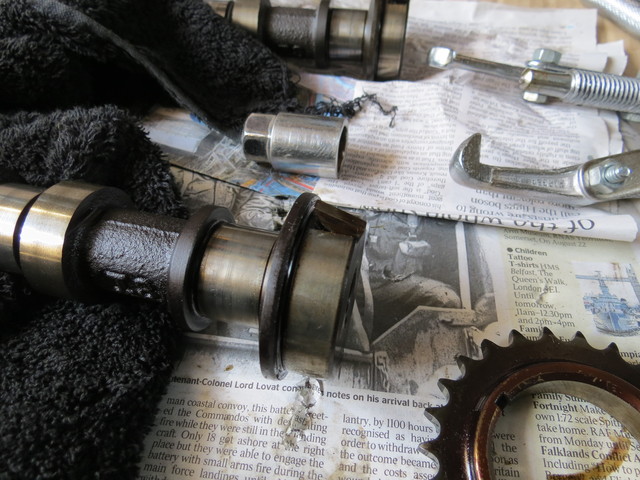
Note that there is a tapered keyway stopping the sprocket rotating on the shaft:
This will either come out when the sprocket is removed or you can lever it out afterwards.
To fit the 'new' sprocket, put the keyway into the shaft halfway (just
to guide the sprocket home rather then fix it in place) and offer the
sprocket up to the end making sure it is the right way round based on
your earlier marking:
Using a piece of wood to protect the metal (this is critical!) tap the
sprocket home. Take your time with this as it might be quite stiff and
you can help it on its way by trying to make sure it moves squarely
down the shaft:
Once the sprocket is home tap the keyway into place with a hammer.
You are now ready to put the new camshaft into the engine but before
doing so you might want to consider swapping the hydraulic tappets for
similar reason as above - whilst the lobes are positioned
off-centre to encourage the tappets to turn and even the wear there may
still be some common wear profiles occuring.
The tappets can be pulled out of the head, but do keep them in
order
otherwise you'll undermine the purpose. It might be difficult to pull
them out with your fingers given the oil so a magnetic pickup tool can
be helpful, or some large pliers if you're careful!
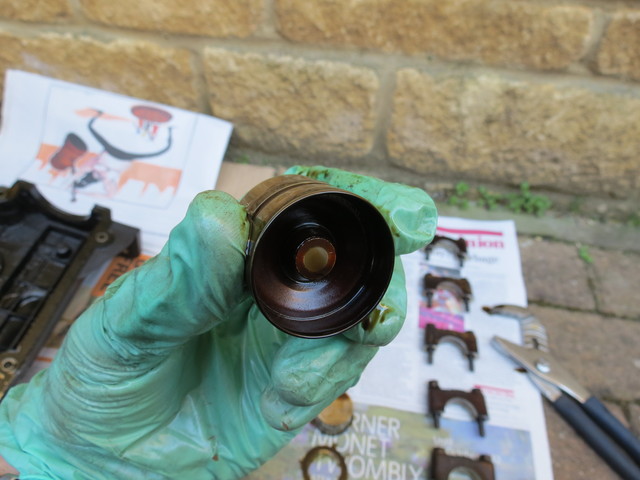
You can test each tappet by pushing on the centre bit - it is basically
a small piston which, given it will still be filled with oil, shouldn't
be compressible with your fingers:
With the 'new' tappets in place rub some oil on them and the smooth cam
faces and offer the cam into the chain (with the timing marks in the
right position!) and back into place:
Check and check again that the timing marks are as before! It should be
easy to spot if they're not because even half a link out will be
obvious.
You can now put the bearing caps back in the right order (arrows facing
the belt end, and counting 1 through 5) but don't tighten them up fully
yet. Similar to how we removed them, tighten them gradually making
several passes 1 through 5 and round again. At least one pair of
springs will require some compression and so you want to try and make
sure this happens gradually with the load spread across all the bearing
caps if you can.
The bolts should be finally tightened in the order 1 through 5 to a torque of 12-14 Nm (120-140 kg·cm, 9-10 lb·ft).
With the cam in place, double-check the timing marks again - there may
not be a second chance once your've started the engine! It is also
worthwhile rotating the engine a couple of turns to make sure you can
(i.e. that the valves aren't fouling the pistons) and then recheck the
torque of the bearing cap bolts.
Having cleaned up any old sealant refitting the valve cover should be
done with care. The gasket provides the seal and being rubber it does
this through only slight compression - if you overtighten the bolts you
can easily crack the valve cover as it is only made of plastic! The
correct torque setting is 8-10 Nm (80-100 kg·cm, 6-7 lb·ft) however
this is likely at the very bottom end of most torque wrenches so I
would instead advise doing them by hand - finger tight then just nip
them up to secure. You might want to do this through several passes in
order to compress the gasket squarely.
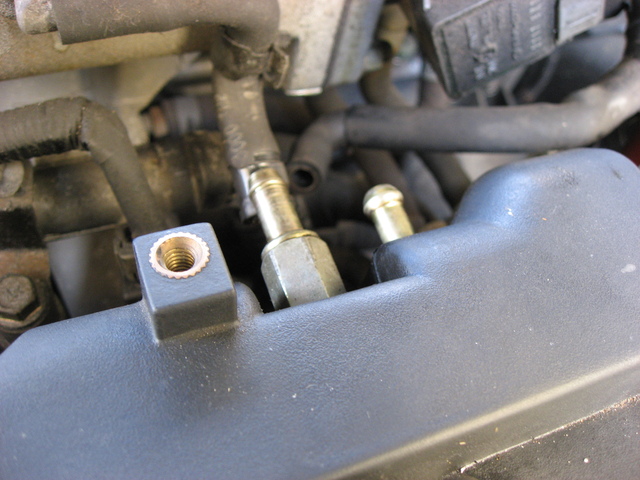
With the cover in place reattach the HT leads, breather pipes and oil filler cap:
Before we put the timing and spark plug covers back on the moment of
truth... time to start her up! Holding your breath at this stage is
optional, but recommend nevertheless. Note that there might some
tapping (more pronounced than the injector clicks) as the hydraulic
tappets fill with oil but that should disappear after a few moments.
If the engine hasn't exploded at this point (which it won't have done
given you meticulously followed every step, right?!) then you can check
for any oil leaks (particularly at the timing belt end because that
won't be obvious once the cover is back on) before putting the
remaining covers back in place and take it for a spin! It would be
worthwhile check again later for oil leaks because they may take a
while to manifest themselves.
Good luck!
1,936,151
Visitors
(since Apr 2003)

© 2002-2025 Mathew Newton
Unless otherwise stated, all content on this site is licensed under a Creative Commons Attribution-Non-Commercial-ShareAlike 3.0 Unported License
Any reproduction/reuse of content must comply with this license and be attributed to Mathew Newton
If you're human, don't click here, here or here